Aircraft Welding and Steel Tube Fabrication Part 3
A Primer for the Novice Aircraft Builder
By Budd Davisson (originally published in EAA Experimenter, October 1987)
At one time, in the 1930s, when you talked about steel for use in aircraft structure, you would be talking about three, maybe four, different types of steel. Today, however, that's all boiled down to one specific type: 4130 chromium molybdenum, commonly known as chromoly. The only other type of steel you are likely to run into would be in really old antiques, and that would be 1025 steel. As far as welding goes, there is very little difference between the two, and the standard procedure when repairing an old steel tubing structure is to always use 4130, since it is better to have a newer, higher strength steel than use the old 1025 and be wrong.
Just for the record, the numbers 4130, 1025, 1018, 1026 or any of the other numbers/names used for designate a specific type of steel, are not just arbitrary. They indicate the base alloy of the steel and the carbon content.
Characteristics
The reason the industry standardized on 4130 as being the aircraft steel is that it does just about everything you'd want it to do well. It has a high ultimate strength of 94,000 psi, but at the same time has good ductility, especially in the normalized condition, meaning it can be bent quite a little before it breaks or coldworks to any great degree. At the same time, it is easily welded using oxy-acetylene or TIG methods, which greatly eases all fabrication. Also, its high strength, in comparison to its weight, is ideal for building tubing fuselages because aircraft structural strength-to-weight ratios are of prime importance.
4130 chromoly is available in just about any shape you want it, from rods to billets, seamless tubing, square tubing and streamlined tubing, as well as plate or sheet. For no apparent reason, it also comes in two different surface finishes: hot rolled and cold rolled. The cold rolled stock is much smoother and vaguely shinier in appearance, while the hot roll is much darker and often has surface imperfections that must be watched carefully so that they don't fall into critical areas, such as in the bend of a fitting.
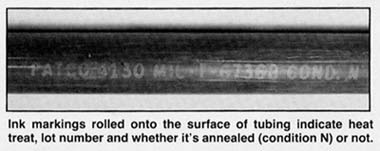
4130 comes in two different heat treat conditions: condition N, or normalized, and straight 4130, which is not normalized. It is absolutely critical that all tubing and plate used in aircraft structure be 4130N or normalized condition, because that has been heated up and had all of the locked-in internal stresses caused by manufacturing removed. If a piece of straight 4130 in a non-normalized condition is utilized, it would be possible to weld two pieces together and have such a mess of locked and unlocked stresses, and normalized and non-normalized areas, that the joint might be worse than useless. Tubing and plate all come with an ink marking rolled onto the surface that indicates the heat treat, lot number, and whether it is condition N or not. If you come up with some steel that is supposedly 4130 condition N, but it has no markings on it and you can't prove its heritage, it's a good idea to trade it in for some steel you can identify.
BASIC WELDING CONCEPTS
Before you light up a torch and get ready to set fire to your basement, you should realize what it is that you are trying to accomplish. What does a good weld do? You first have to know what your goal is before you can accomplish it. The ideal weld (which almost never exists) is one in which the two pieces of metal are heated, the surface is melted, and the two pieces flow together, cool, and in effect become one piece of metal with no change occurring to the metal itself. That, of course, is all taut impossible. But if you realize what makes the metal change, and what the best method is to blend the two pieces into a single unit, you can at least optimize the situation.
Most Common Mistakes
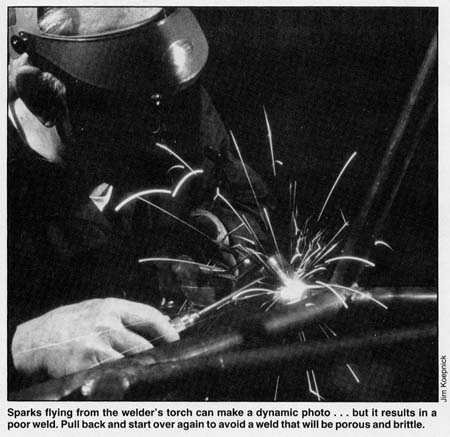
It must be remembered that when we say molten steel we are talking about steel brought up to a specific temperature so that it turns into a liquid; but it is very possible to get the surface of the steel hot enough to appear to melt and not really be melted, which would mean that the temperature was a little bit too cold. At the same time, it is possible to overheat the metal and cause it to oxidize, which is just as bad as having it too cold. The optimum situation brings the temperature up between those two. Later on we will show exactly how to identify that temperature and how to maintain it. The problem of oxidizing or burning the metal is extremely common, and at the same time thoroughly identifiable. Taken into its absolutely simplest terms, if you've got lots of sparks coming off the weld in progress, take the torch away and stop, because you've gotten it so hot that portions of the metal are combining with the oxygen in the air and burning off, which creates a porous weld and is extremely brittle.
In the case of a weld that is too cold, the welding rod was melted and allowed to flow onto the parent metal without the two of them actually flowing together, which means that under stress the weld will come apart right at the surface line, because the melting did not penetrate into the surface.
Another possible contributor to the bad-weld syndrome is that of having a sloppy joint fit. Here, too, we'll get into this later, but this is normally not a serious problem, because it is so easily identifiable before the weld is being done. If one is conscientious in putting together his joints and is willing to throw away a piece of tubing now and then, the bad-joint syndrome will never develop.
Choosing a Tip
Your first time out of the gate, the best way to select a tip is to look at the chart that came with your welding rig. This will give you a place to start, but you will find, as you get used to doing more torch work, that the chart doesn't always fit the situation, because it doesn't take into account the effect of "heat sinks" (more on that later) or the difficulty involved in getting in to a particular joint as to be able to concentrate the heat where really needed. As a general rule, however, you will find that for most of your tubing joints and those utilizing .050 metal and lighter, the two next-to-the-smallest tips supplied with your rig will do the job. Here, too, though, be prepared to change tips in the middle of a weld or to preheat with one tip and go to another as the weld progresses.
Setting the Regulator Pressure
If you read the handbook that comes with your welding rig, you will find a different pressure combination set up for each gauge of metal. At the same time, however, if you talk to oldtime aircraft welders, you will find that nine out of ten of them set both regulators at 8 or 10 pounds and forget them. Because of the narrow range of metal thicknesses being utilized in an aircraft, the preceding system appears to work quite well. However, as you work up into the larger tips, pressure becomes more critical to prevent "popping," and in the smaller tips too much pressure will become evident in a flame that is "blowing" too hard as you get up toward the upper limit of that tip's heat range. Still, the 8 pounds on both regulators seems to work just fine most of the time. As the old adage says, however, "when in doubt, read the instructions."
Selecting Welding Rods
An awful lot of welding has been done throughout the years using garden variety clotheshangars for rod, but not on aircraft. In welding 4130 use a mild steel rod that is usually available with a slight copper coating on it to keep it from rusting while it's laying around the shop. The most commonly available rod starts at 1/16" in diameter and 36-inch lengths and goes up in 32nds of an inch increments. Because of the size of the material used in an aircraft, however, it is seldom that anything larger than 1/16th of an inch is used, but having a small amount of 3/32nd rod laying around for use in the larger fittings is often helpful.
Don't be a cheapskate when you buy your welding rod. It costs next to nothing, and it's a major aggravation when you run low on Saturday night and you find yourself scrounging around the shop for short pieces of used rod and welding them together to be able to continue. A 5 lb. bundle is 2 to 3 inches across and 36 inches long, but only costs a few bucks.
Joint Preparation Assumptions
We'll get into the real nitty-gritty of making your joints fit like they grew that way later on in this series, but there are some very basic assumptions that go a long way toward making for easy and good welds.
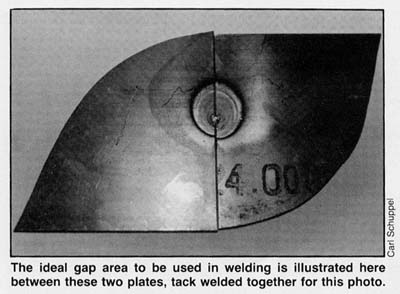
The first thing you should know is that when you're fitting your tubing together, you don't want it to be snapped into place so that it's touching. That makes for an easy weld, but as the material gets hot and expands, it also forces the pieces apart and can cause major misalignment in your structure. A sixteenth of an inch gap is just fine, and you can even vary from that a little without it being a big deal. Also, while it's a good idea to have the edges of the tubing joint filed nice and clean, it's not really critical, because, if you're doing your job as a good welder, you are going to melt those edges away, anyway. However, remember: the better and more even job you do of fitting the pieces together, the easier it is to make a tight, good-looking weld job.


